Tutorial: Manual Batch Ingestion
Tutorial: Load Sample Data into Druid
To get comfortable with Druid, we'll walk you through loading a sample data set. Normally you will specify a path to your data (for example, a BigQuery table), but in this example, you won't have to provide a path since it is build into this example. Note that since you are creating a dataset, you will need Editor privilege to access the Load Data tab referenced in this tutorial.
Click on
Druid ConsoleThis is a button in the upper right of RCC. A new tab will be created for you that displays the Druid console. You'll see see
Load Data,Ingestion, andQuerytabs.Click on the
Load DataIf you've loaded data recently, you will see two buttons that give you the choice of "Start a new spec" or "Continue from previous spec". If you see these buttons, click Start a new spec. You should now be looking at a panel of tiles that represent your choices for where you will load data from.
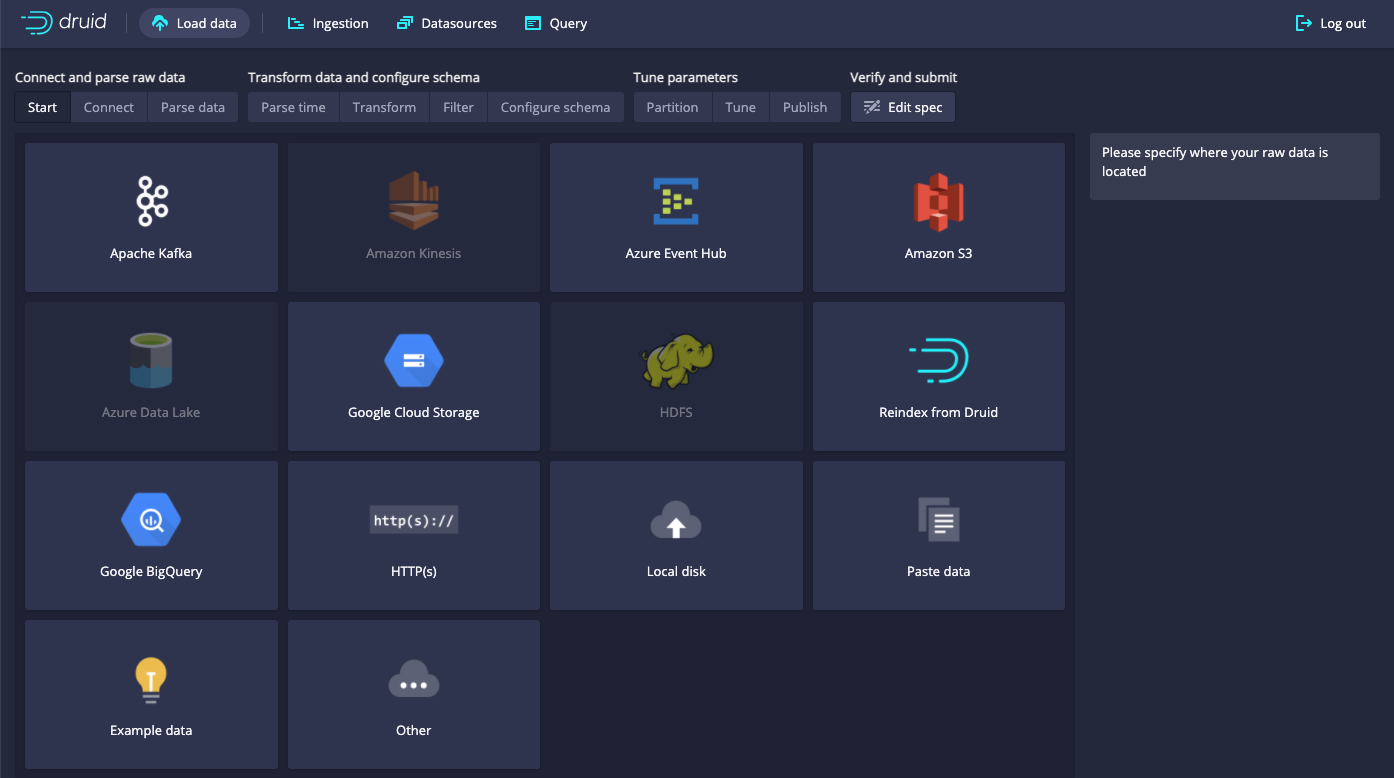
If you were loading your own data you would now click on a data source such as Google BigQuery and then you would specify a path to your BigQuery table. In this example data, we will load sample data that is available within Druid,
Click on
Example dataand thenLoad example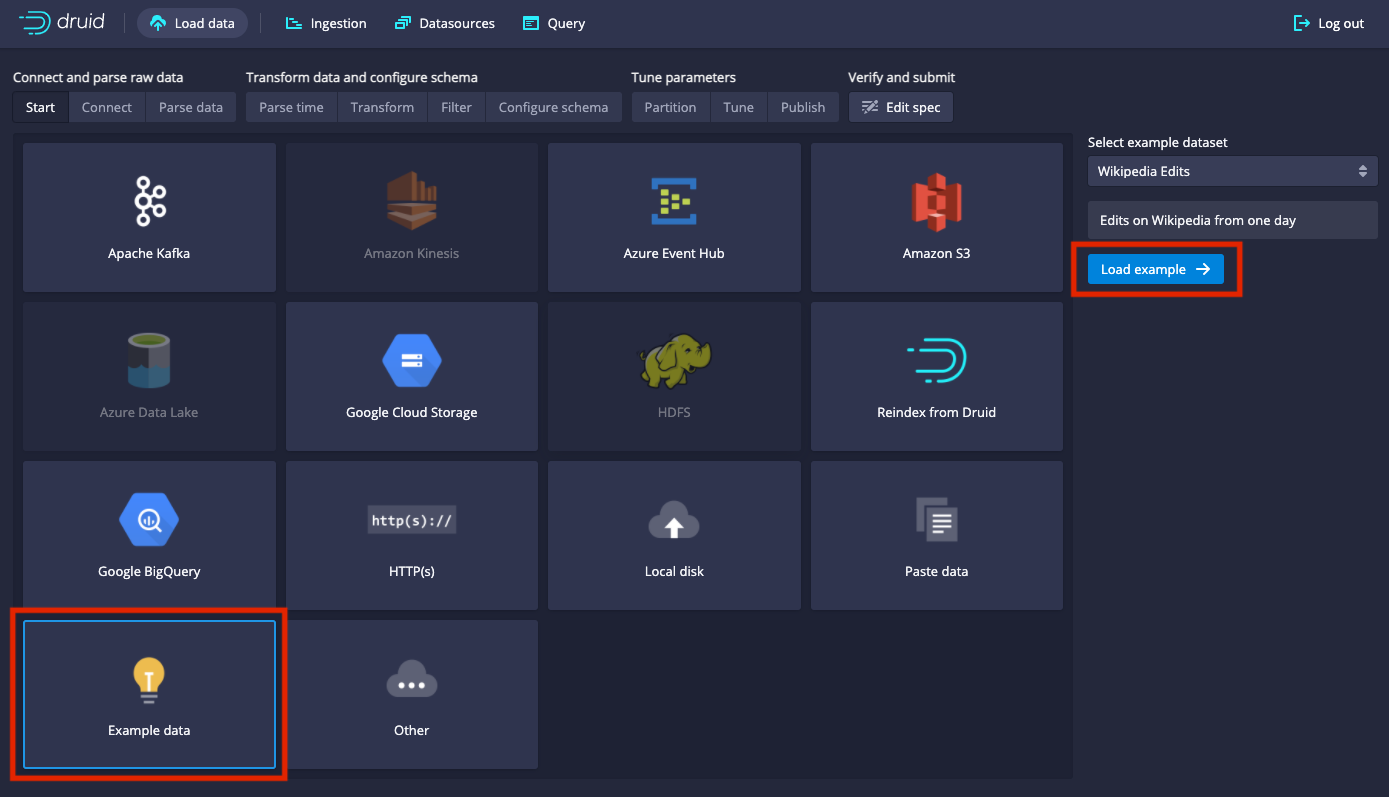
This loads the example data and displays your data, giving you a chance to verify that the data is what you expect. In this example we are looking at a wikipedia dataset.

The tabs along the top of the page:
Start,Connect,Parse data, ...Publishrepresent stages in the ingestion process. In this example you will move from stage to stge by clicking theNextbutton in the bottom right of the page. Each time you click theNextbutton, Druid will move to the next stage, making its best guess as to the appropriate parameters.The highlighted tab at the top will indicate the stage you have just moved to and if you want to re-execute that stage with different parameters, you can change the parameters in the form at the right amd then clickApply.
In the next steps you will walk through these stages of the ingestion process by clicking the button in the bottom right (currently Next: Parse date), but you can also move back and forth among the steps by clicking on the tabs at the top.
Click on
Next: Parse dataThe data loader parses the data based on its best guess about the type and displays a preview of the data. In this case the data is json and it chooses json, as shown by the
input formatfield.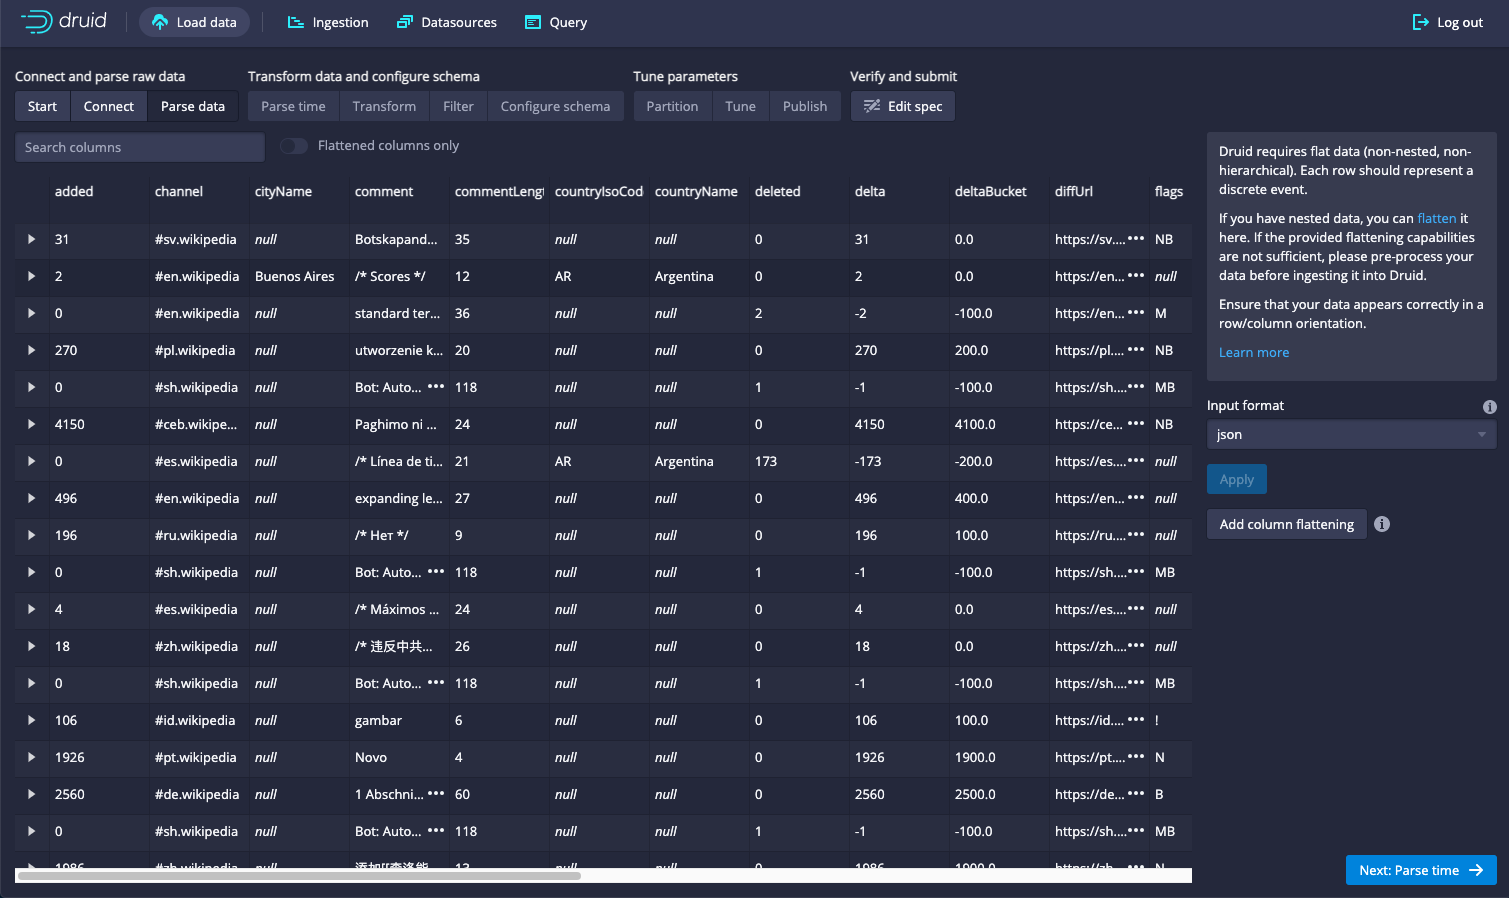
If the data was not json, you could change this and click apply. Click on the
input formatfield to get a sense of the other choices, and feel free to click apply, but make sure JSON is selected and the display is showing your data before you proceed to the next step.Click
Next: Parse timeThis step analyzes the data to identify a time column, and moves that column to the far left, with the column name __time. You can see that it is coming from the column originally labeled 'time'.
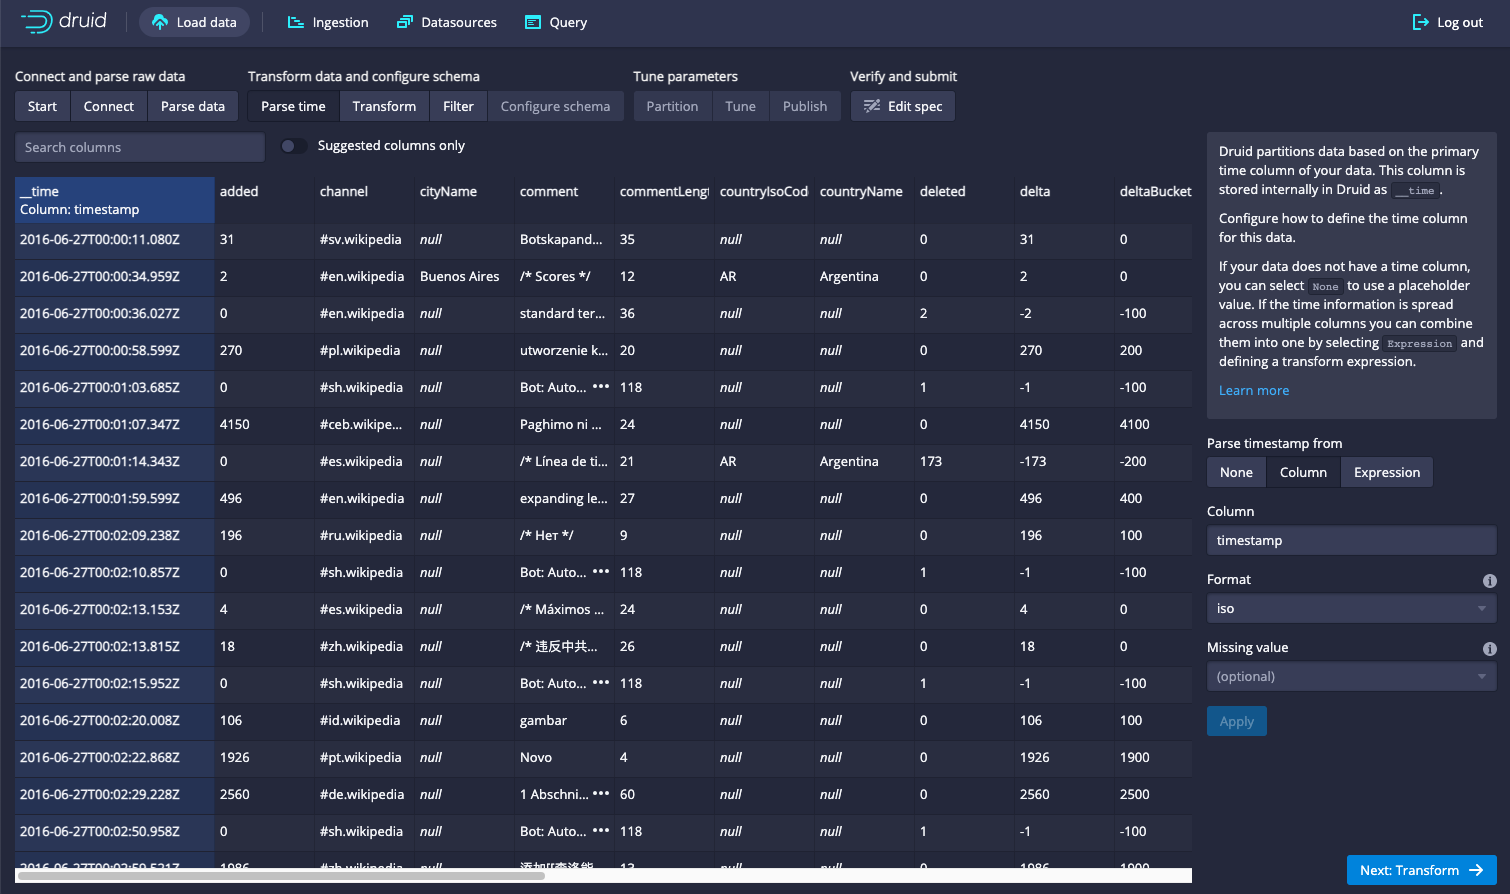
Druid requires that you specify a timestamp column and it does optimizations based on this column. If your data does not have a timestamp column, you can select
Constant value, or if your data has multiple timestamp columns, this is your opportunity to select a different one. If you specify a different time column than the default, you clickApplyto apply your new setting. In this example, the data loader determines that thetimecolumn is the only candidate to be used as a time column. That's our only time column in this data set, so we leave it set as is.Click
Next: TransformIn this step we have the opportunity to transform one or more columns or add new columns.
Let's add a new column. In the panel on the right, click
Add column transform. In the form that expands, setNametocomment_prefix, leave theTypefield as is, and change the value of the third field,Expressiontosubstring("comment", 0, 6), then clickApply. This creates a new field calledcomment_prefixthat contains the first six characters of the comment field. You can alternately transform an existing column in place by putting the column name in theNamefield.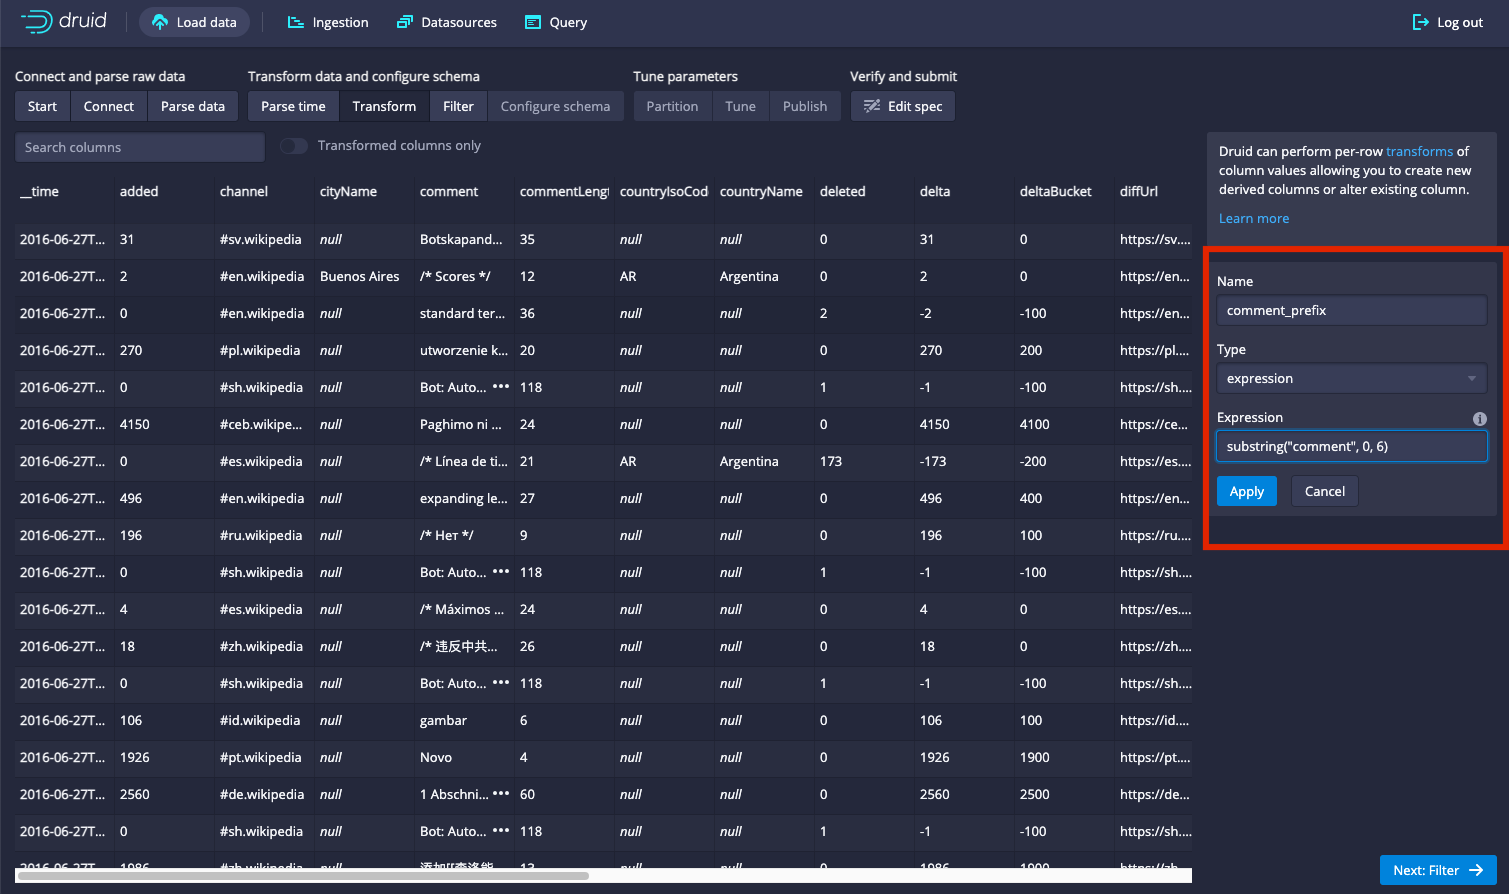
After clicking
Apply, you will see the new column to the right of theCommentcolumn.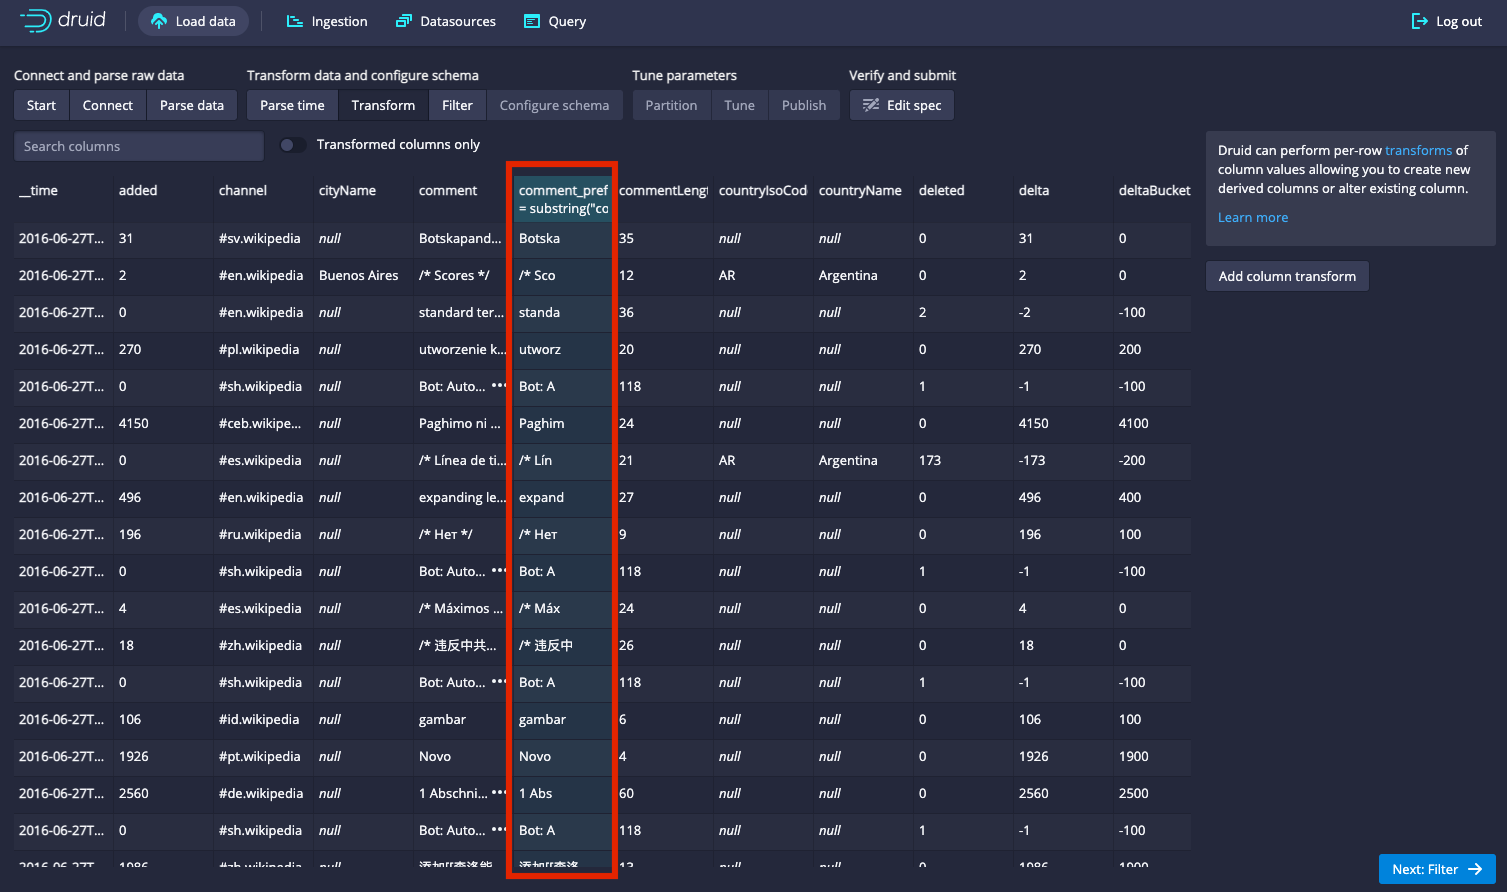
You have full SQL available to you for making these transformations. To see the expressions and functions available, click on the little
iwith the circle around it and then click on theexpressionlink. This will bring uphttps://druid.apache.org/docs/0.20.0/misc/math-expr.html
which describes the expression syntax.
Click on
Next: FilterHere you have the opportunity to filter out rows. To see the syntax, click on
filterlink in the help, which will take you tohttps://druid.apache.org/docs/0.20.0/querying/filters.html.
We'll skip doing any filters here.
Click on
Next: Configure Schema.This takes you to a stage where you have the ability to do all of the following:
- specify what dimensions and metrics are included in your dataset
- aggregate measures to a coarser level of detail
- create new measures that represent aggregations based on Sketches or HLL. For example you can create a measure that represents an approximation of a count or a unique count of a dimension.
Together these options allow you to make optimizations that can significantly improve performance. In the next steps, we'll walk through some of these options. For a tutorial on how to do this, read the next section, Aggregation in Druid. For now we'll leave the data as is.

Click
Next: PartitionHere in the partition panel you can choose an optimal way to segment your data across the druid cluster. You'll be segmenting based on your time dimension and you can segment at the same granularity as your time aggregation or a coarser granularity. For example, if you've chosen to aggregate your data to the hour, you can choose to physically segment it by hour, by day, by week or by month. For now leave it set to the default,
Hour'.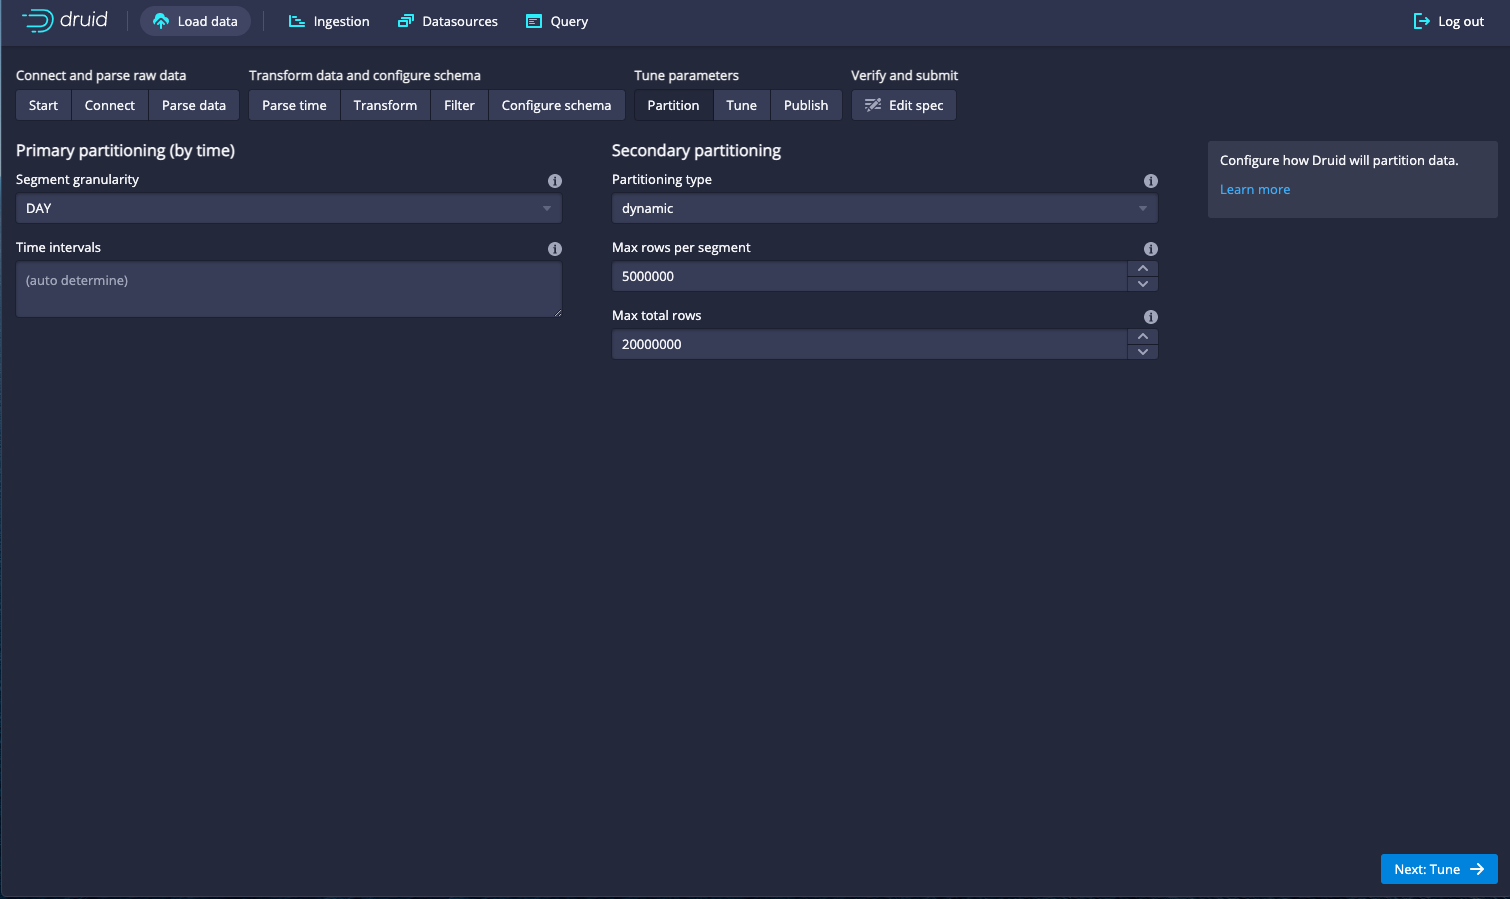
Click
Next: tuneThis allows you to tune the ingestion. Skip this step.
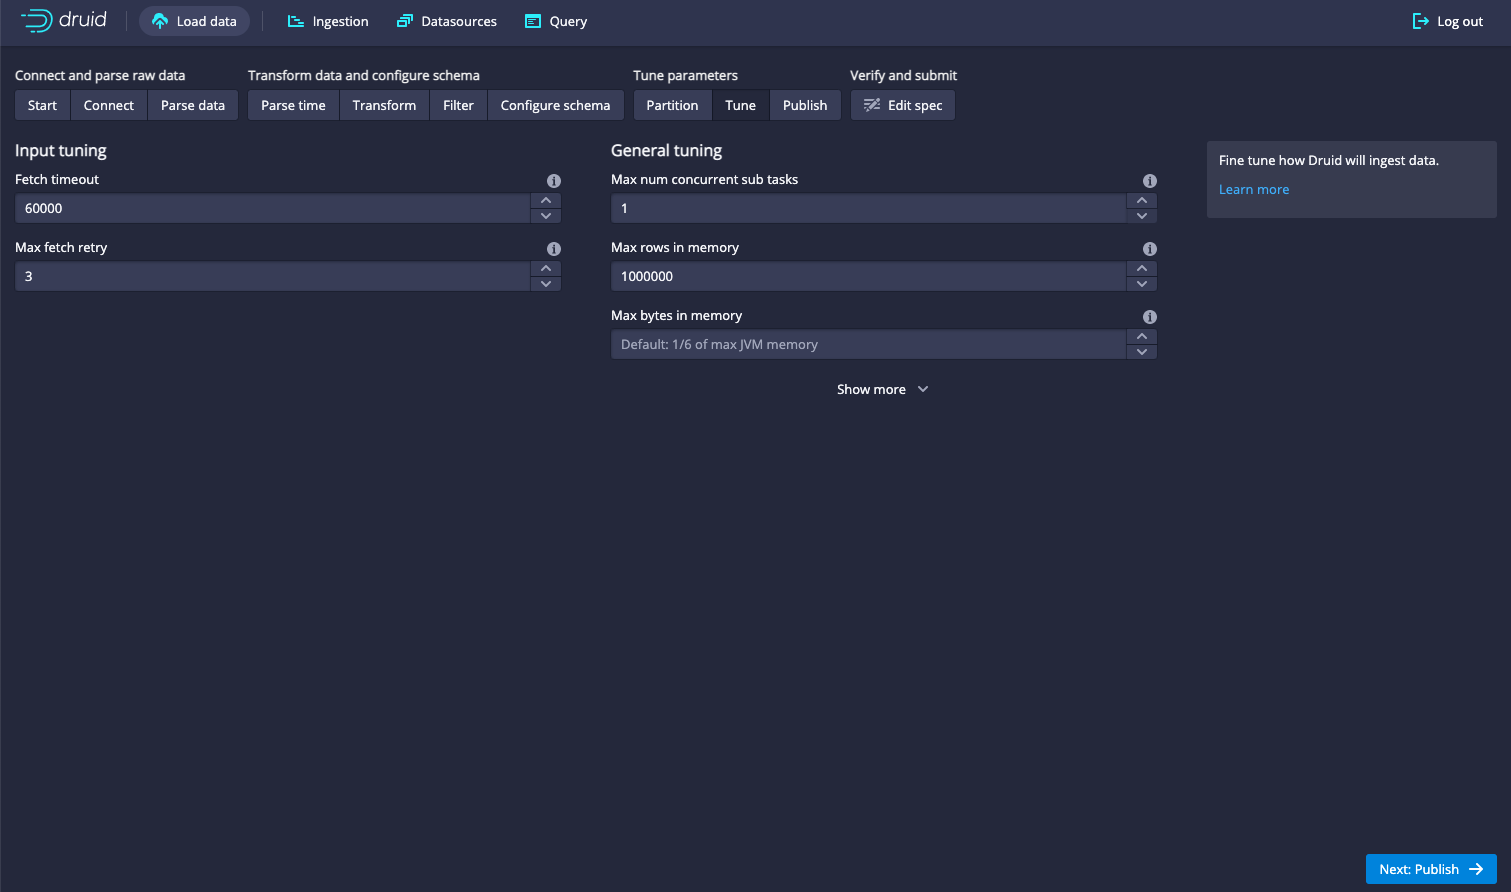
Click
Next: publishHere you can choose the name of your new dataset by filling in the
Datasource namefield.
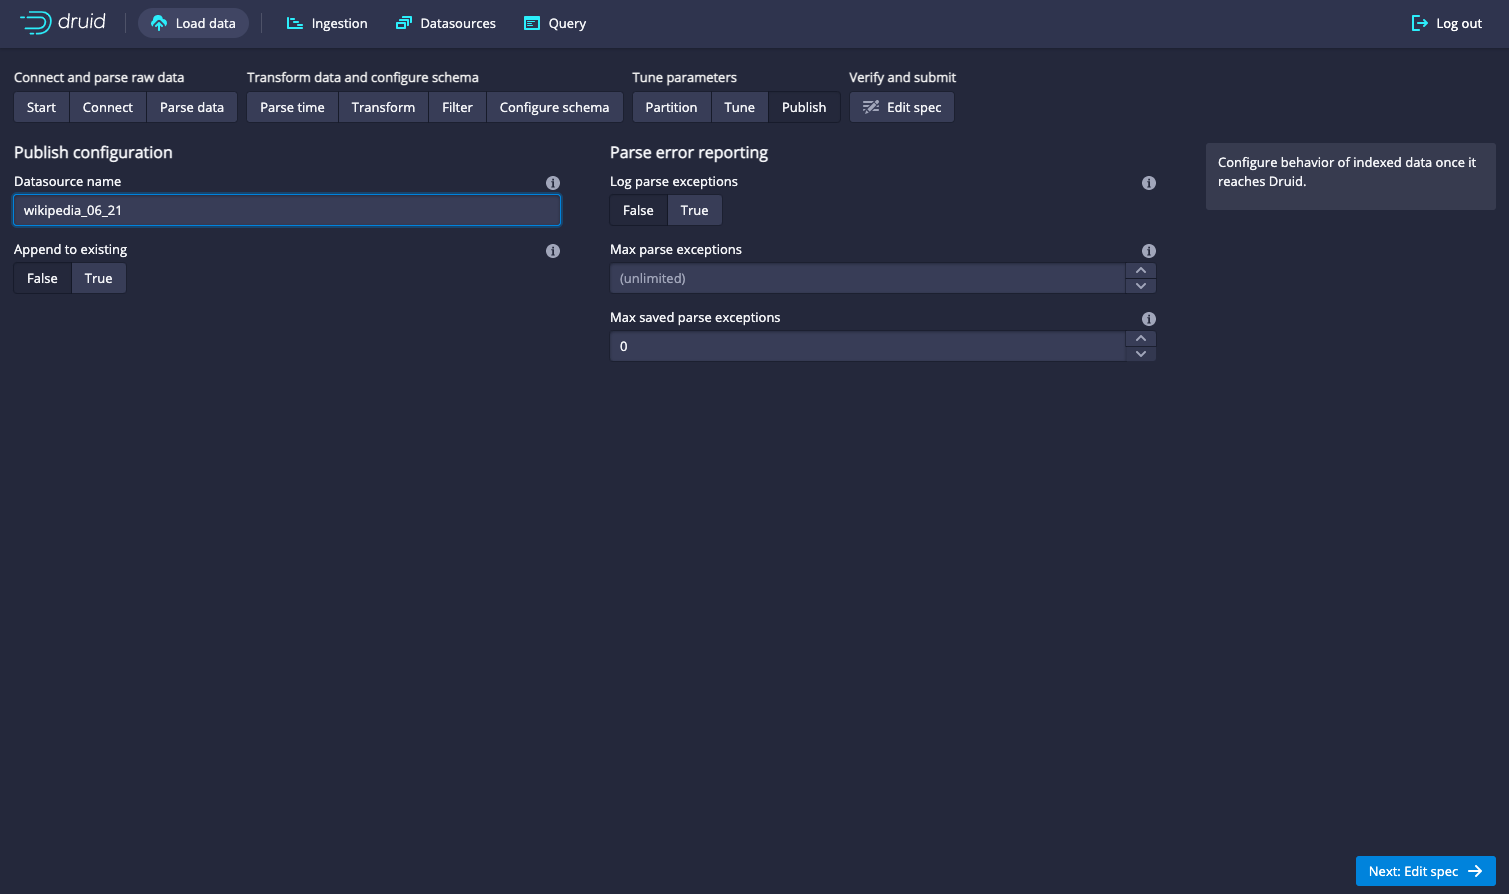
Click
Next: Edit SpecThe json representation of the spec that you just created is displayed. You could edit this by hand (and you can also generate this by hand). Right now we want to go ahead and create our dataset based on the ingestion spec as is, so we won't make any changes.
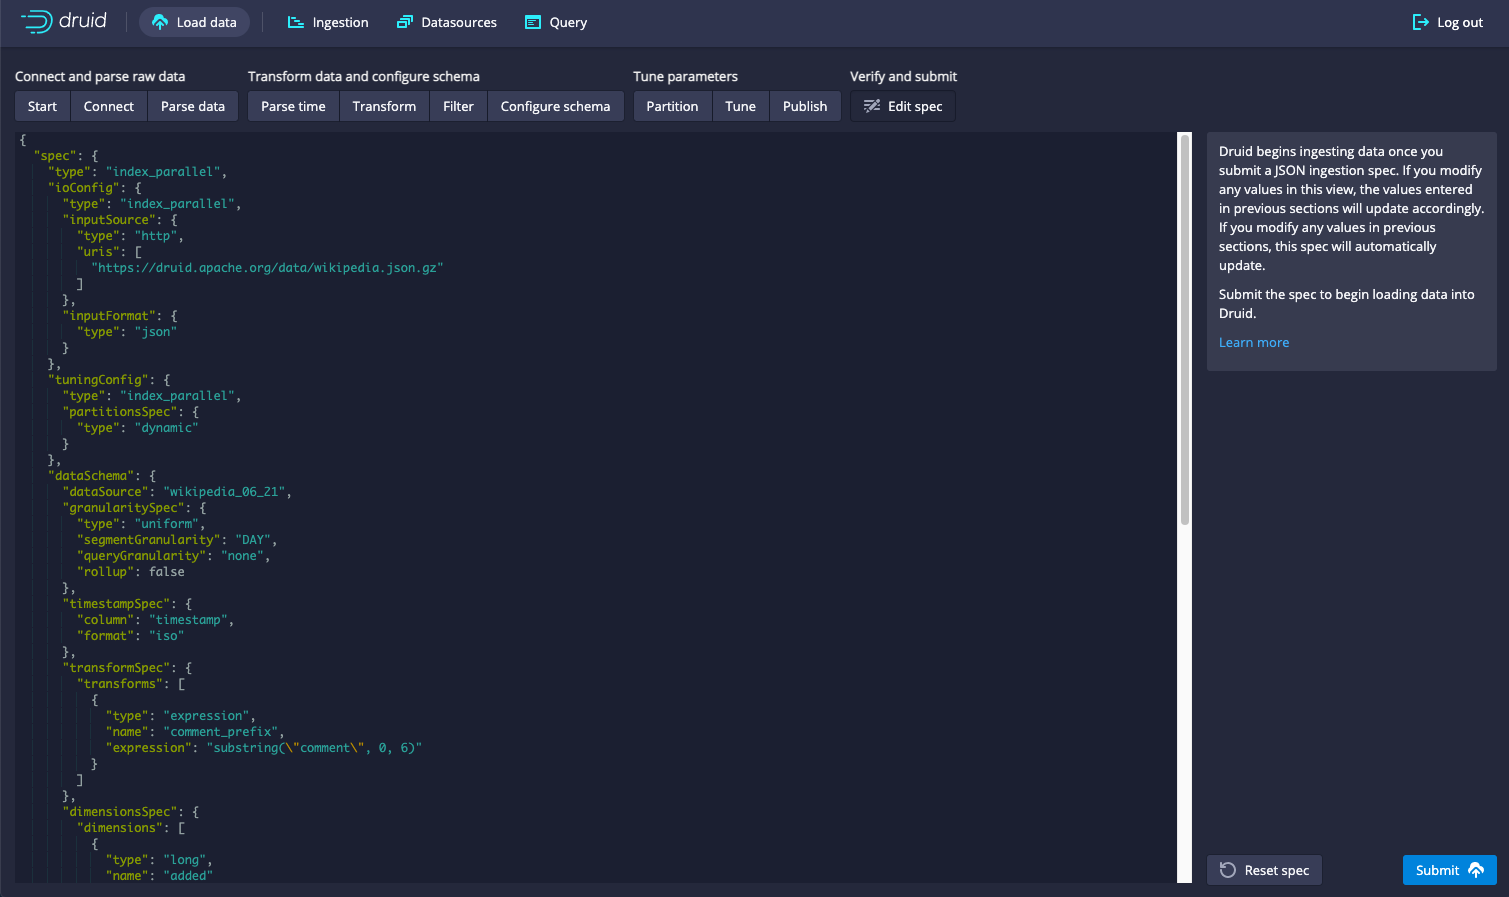
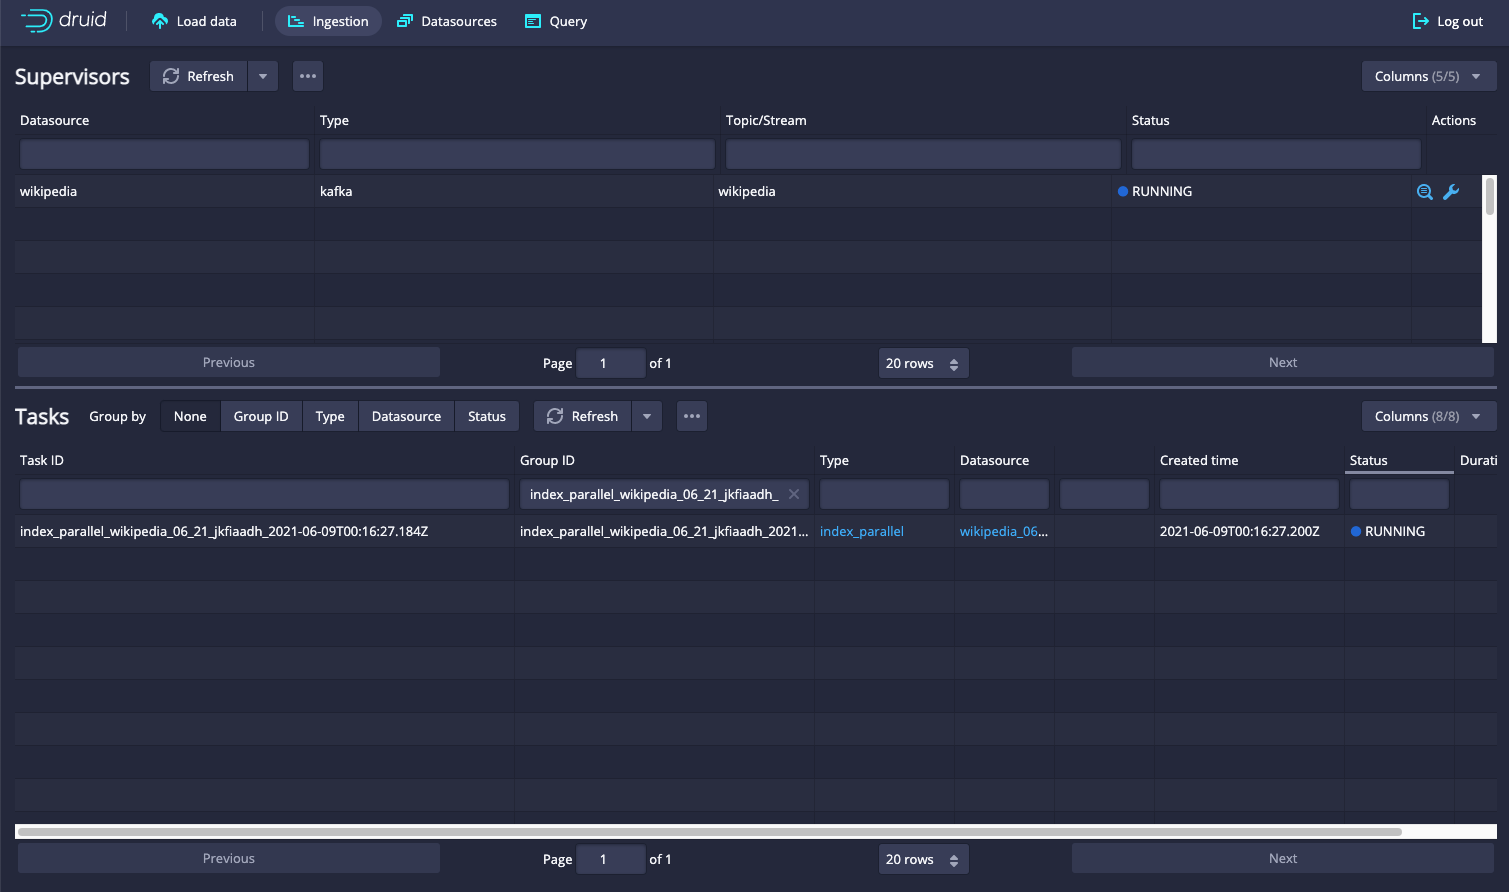
Click
SubmitYou are taken to a panel that shows that status of your job. It will first show the job as running, and then when it's done, the "Running" string will change to "Success". Once it shows success, you can query your data.
Click
Query(rightmost tab at the top)This takes you to the Druid SQL console where you can use SQL to query your data. For example:
SELECT
    countryName,
    COUNT(*) AS \"Count\"
FROM \"wikipedia\"
GROUP BY countryName
ORDER BY \"Count\" DESC
From here you can query your data using Druid SQL. Note that by default
Smart query limitis set to 100. If you want more than 100 rows, turn this toggle off and use thelimitSQL expression to specify your own limit. A description of Druid's SQL language can be found here: https://druid.apache.org/docs/0.20.0/querying/sql.html